In this article, we’ll go through the steps to deploy your Nuxt website on Netlify.
We’ll also learn how to automate the build process whenever you make any changes to the content on Prismic.
This is part 2 of the articles on building a fast static site with Nuxt.js, Prismic, and Netlify.
If you haven’t read the first part, click on this link before you proceed with this article.
Setup and Configure Your Site on Netlify
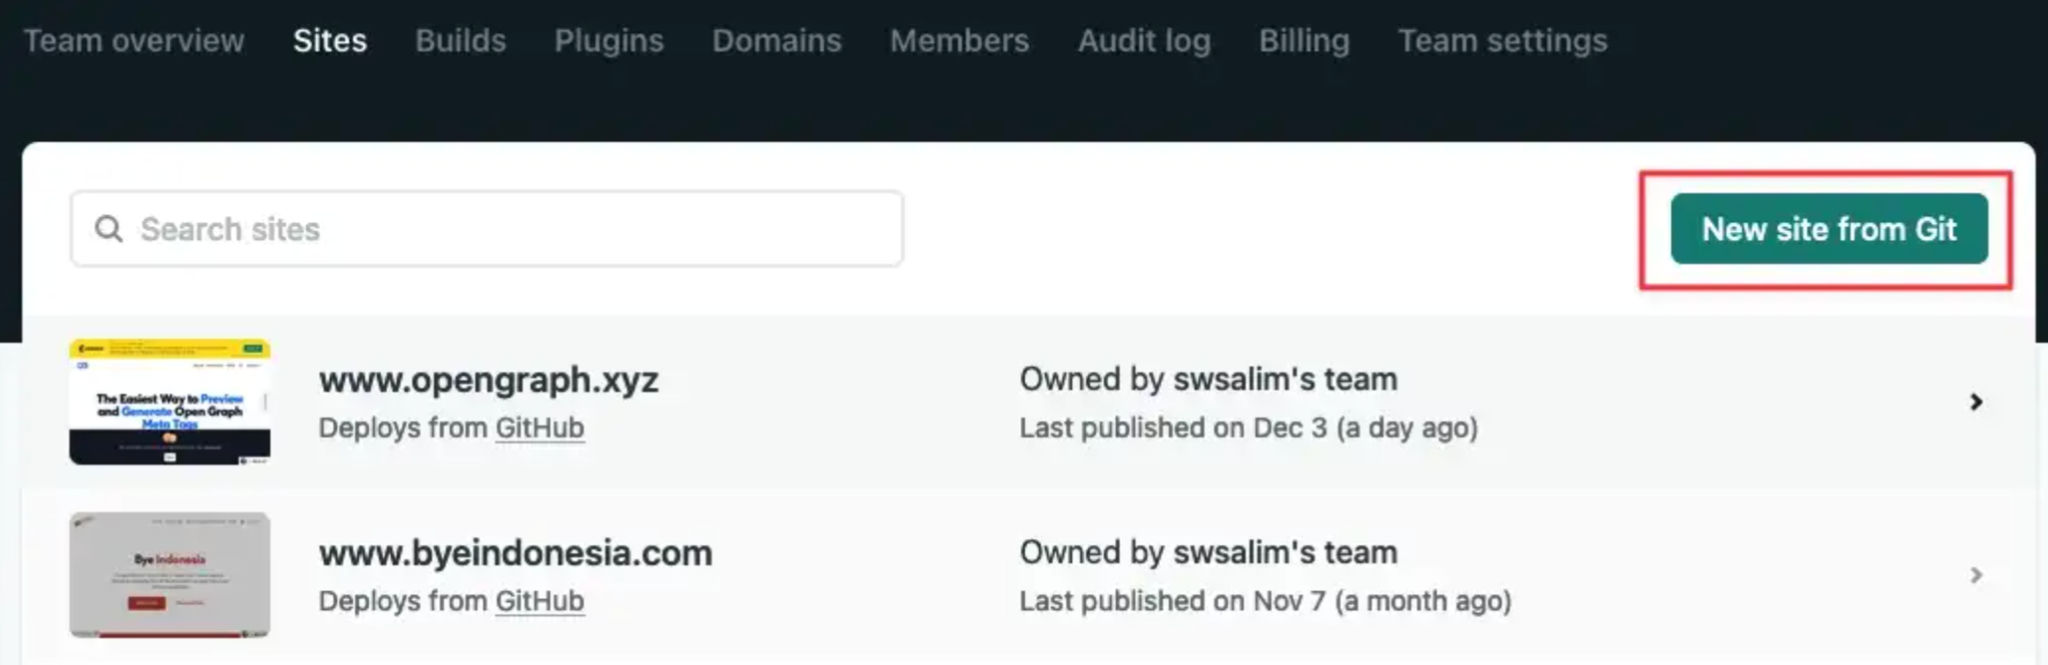
Add Your Repository to Netlify
First, we need to add your repository to Netlify.
Login to your Netlify account and click “New site from Git” on your dashboard.

Or, go to “Sites” and click “New site from Git”.
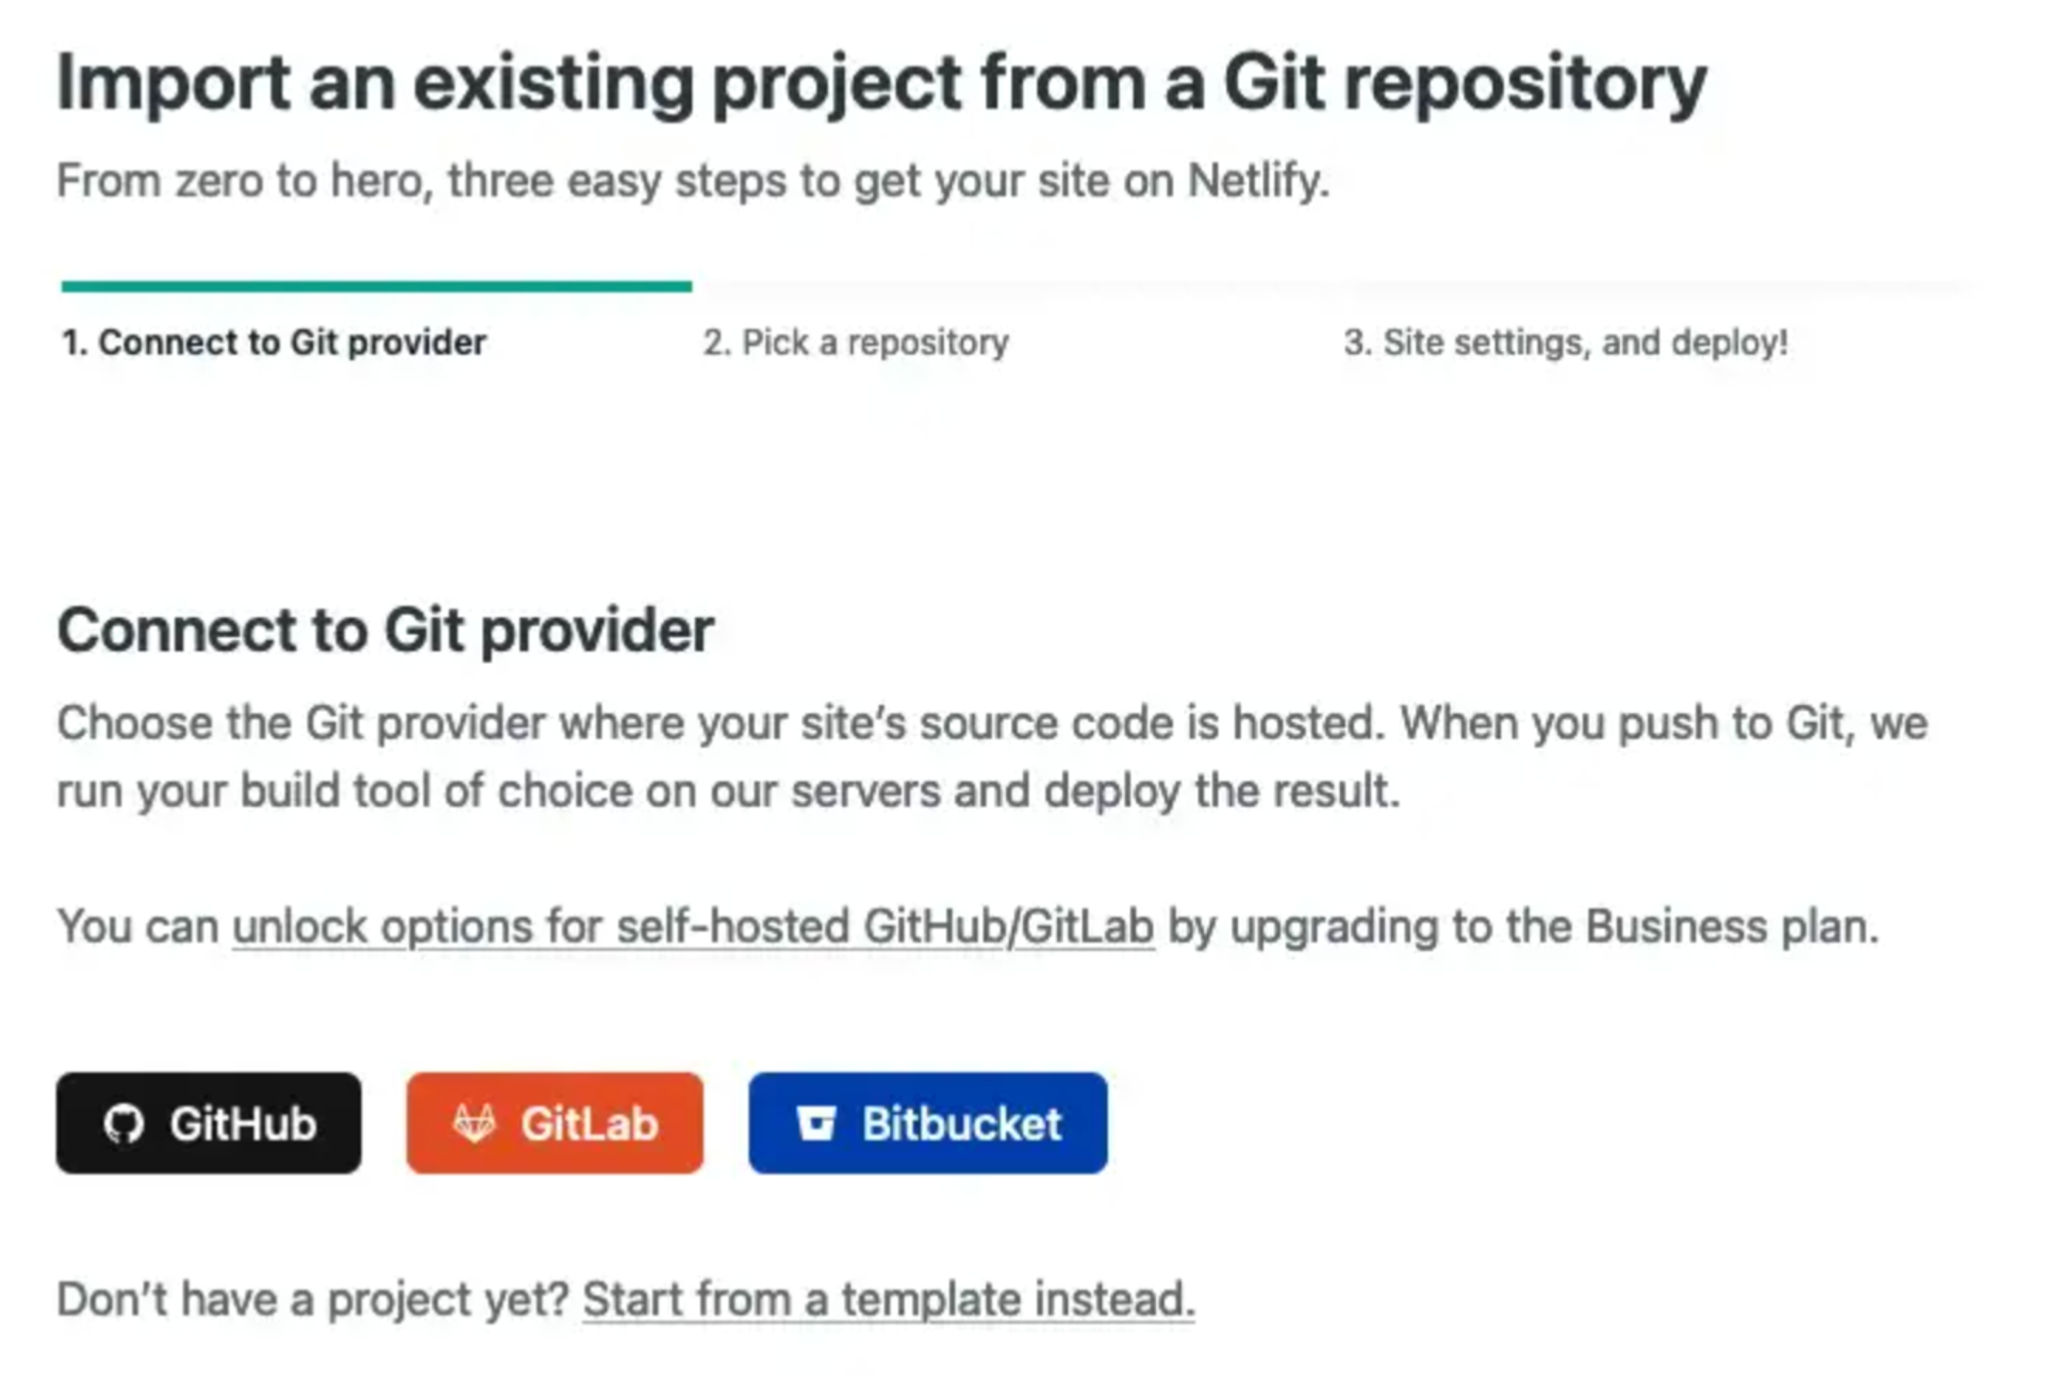
Choose your Git provider and complete the steps.
Configure Your Build Setting
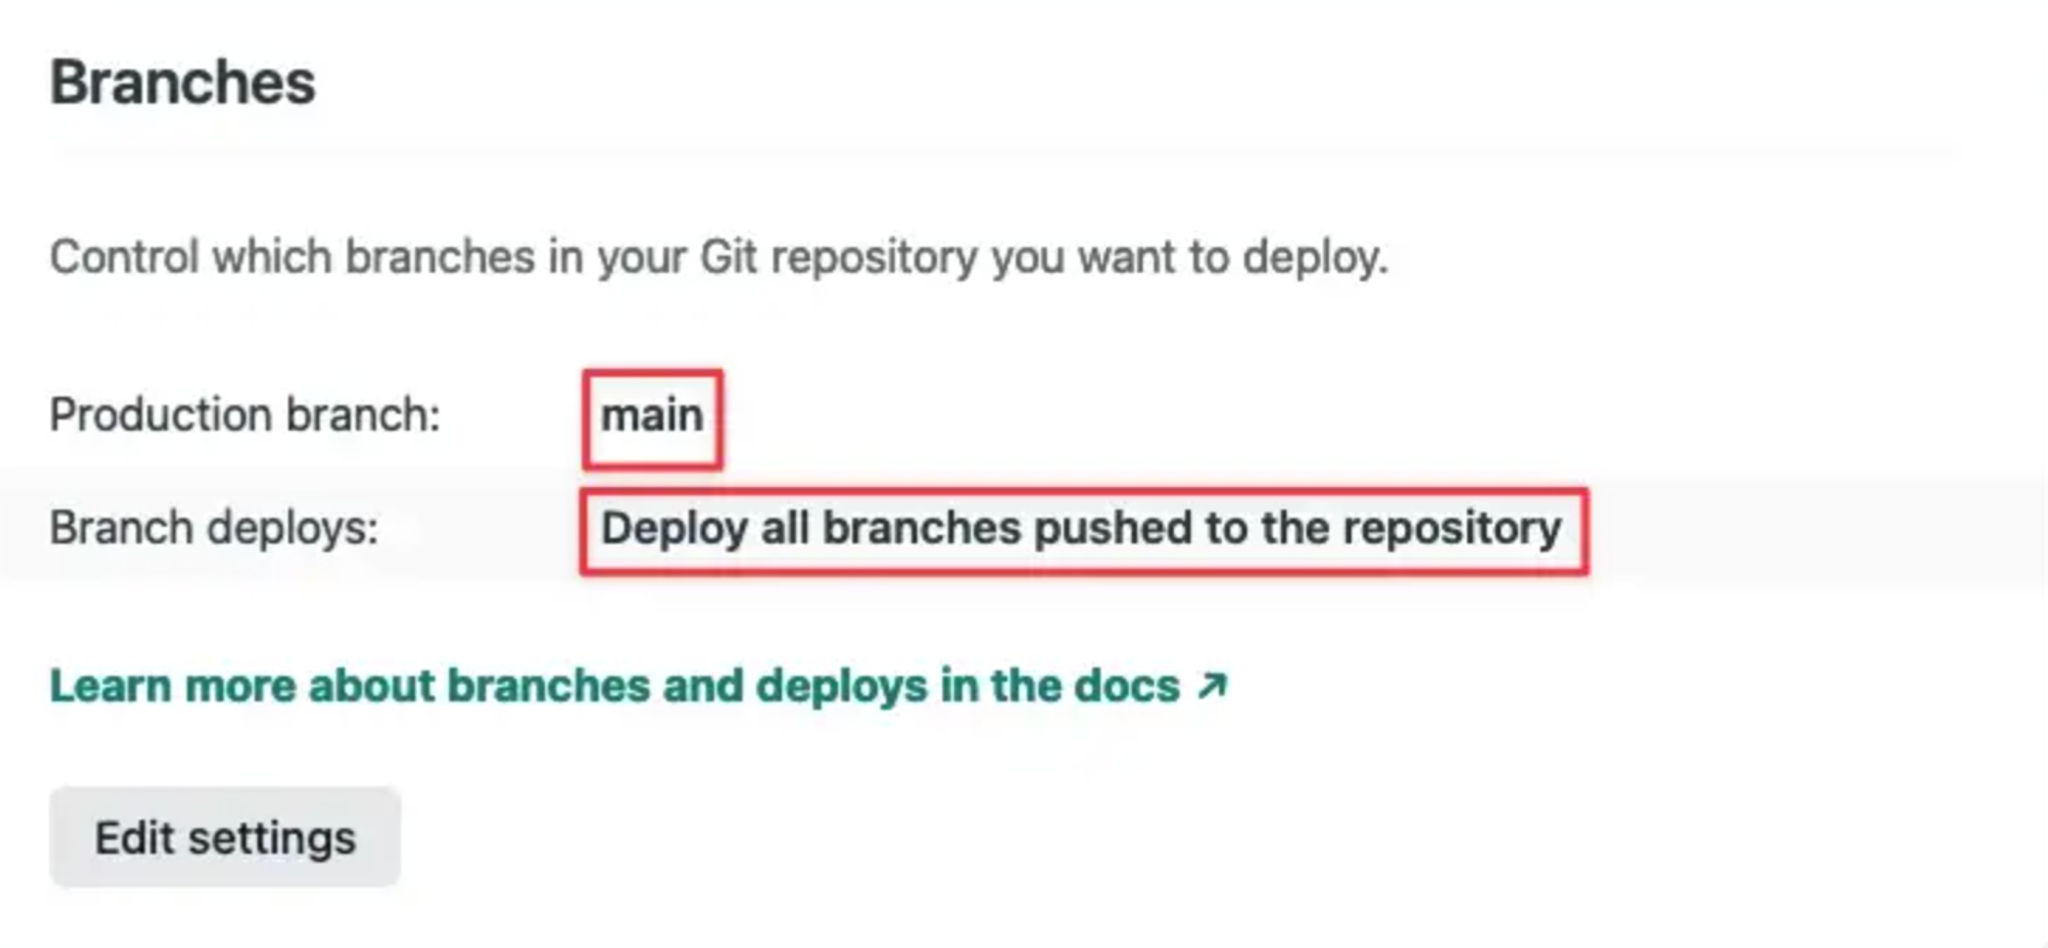
Make sure your build settings are set correctly to enable continuous deployment from your Git repository.
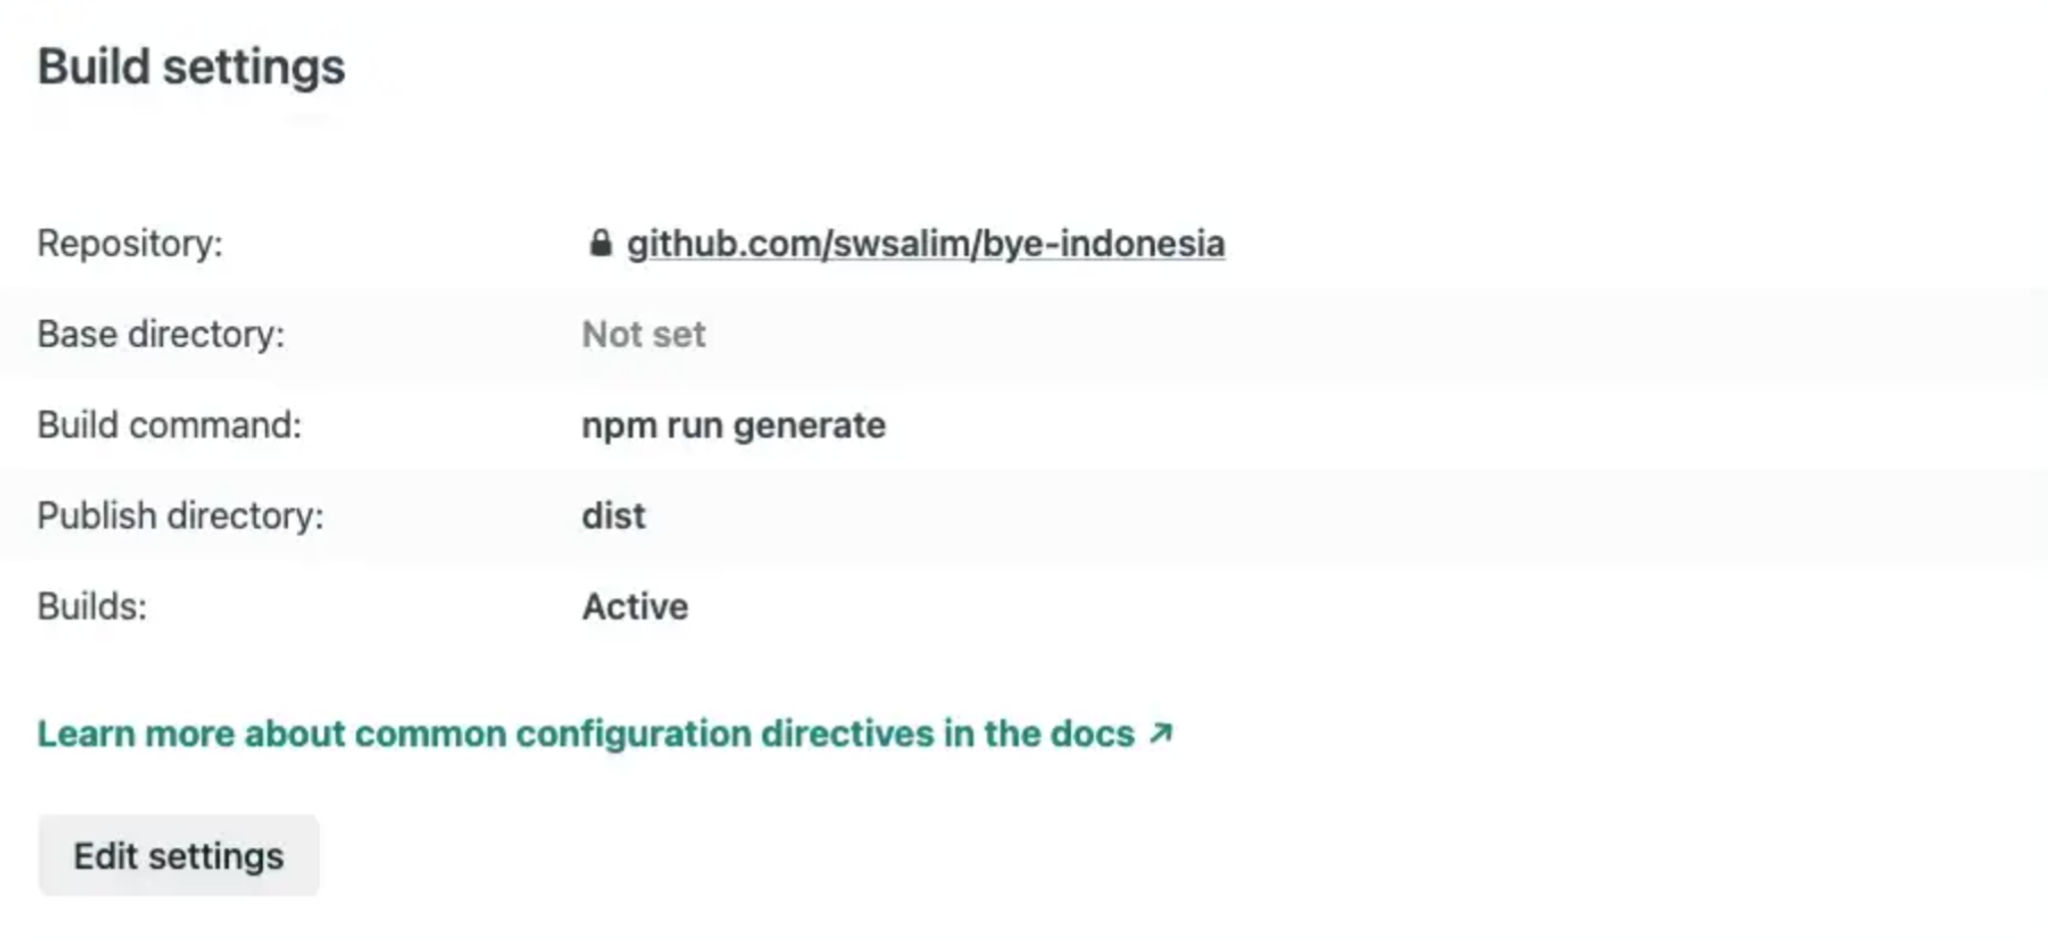
Select the Production branch and which branch(es) you want to deploy.
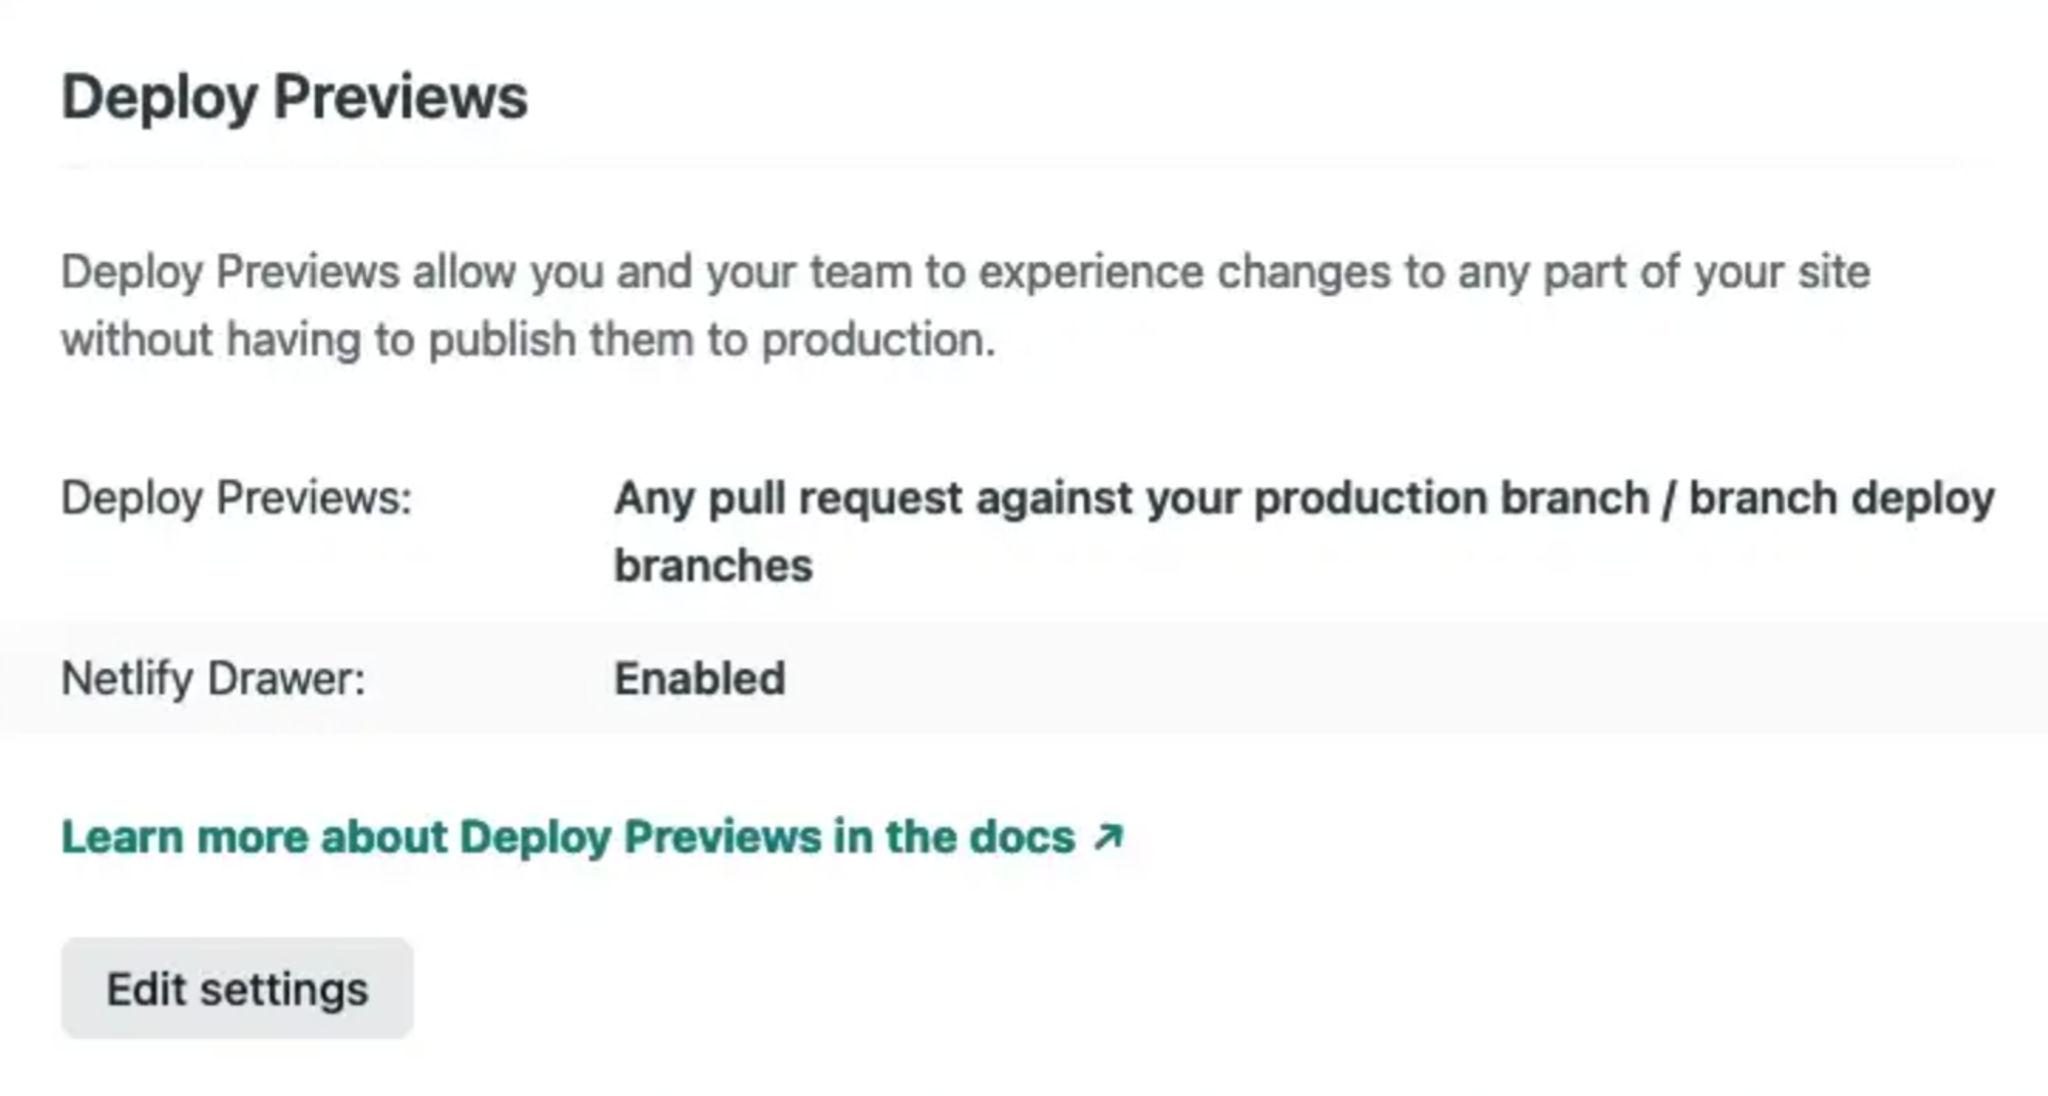
Enable Deploy Previews
This step is optional though I recommend you enable this feature.
When Deploy Previews is enabled, Netlify will deploy any pull requests made against your production branch.
It’s useful if you wanna make sure things are working properly before you deploy your changes.
If everything is working properly, simply merge the Pull Request.
And, you’re all set!
You should be able to view your website live on Netlify.
Trigger Build Process with Netlify
Why Do You Need to Trigger The Build Process?
When you generate a static site with Nuxt or other JavaScript frameworks, it will build the entire site whenever there’re changes made to the code.
Since we host our content on Prismic, Netlify has no idea if the content has been modified/updated.
Don’t be alarmed if you’re not seeing any updated content on your website.
You need to re-build your website on Netlify.
How Do We Trigger the Build Process Manually on Netlify?
Now that you know why, let’s find out how you trigger the build process on Netlify.
To rebuild your website, you could trigger a deployment on Netlify.
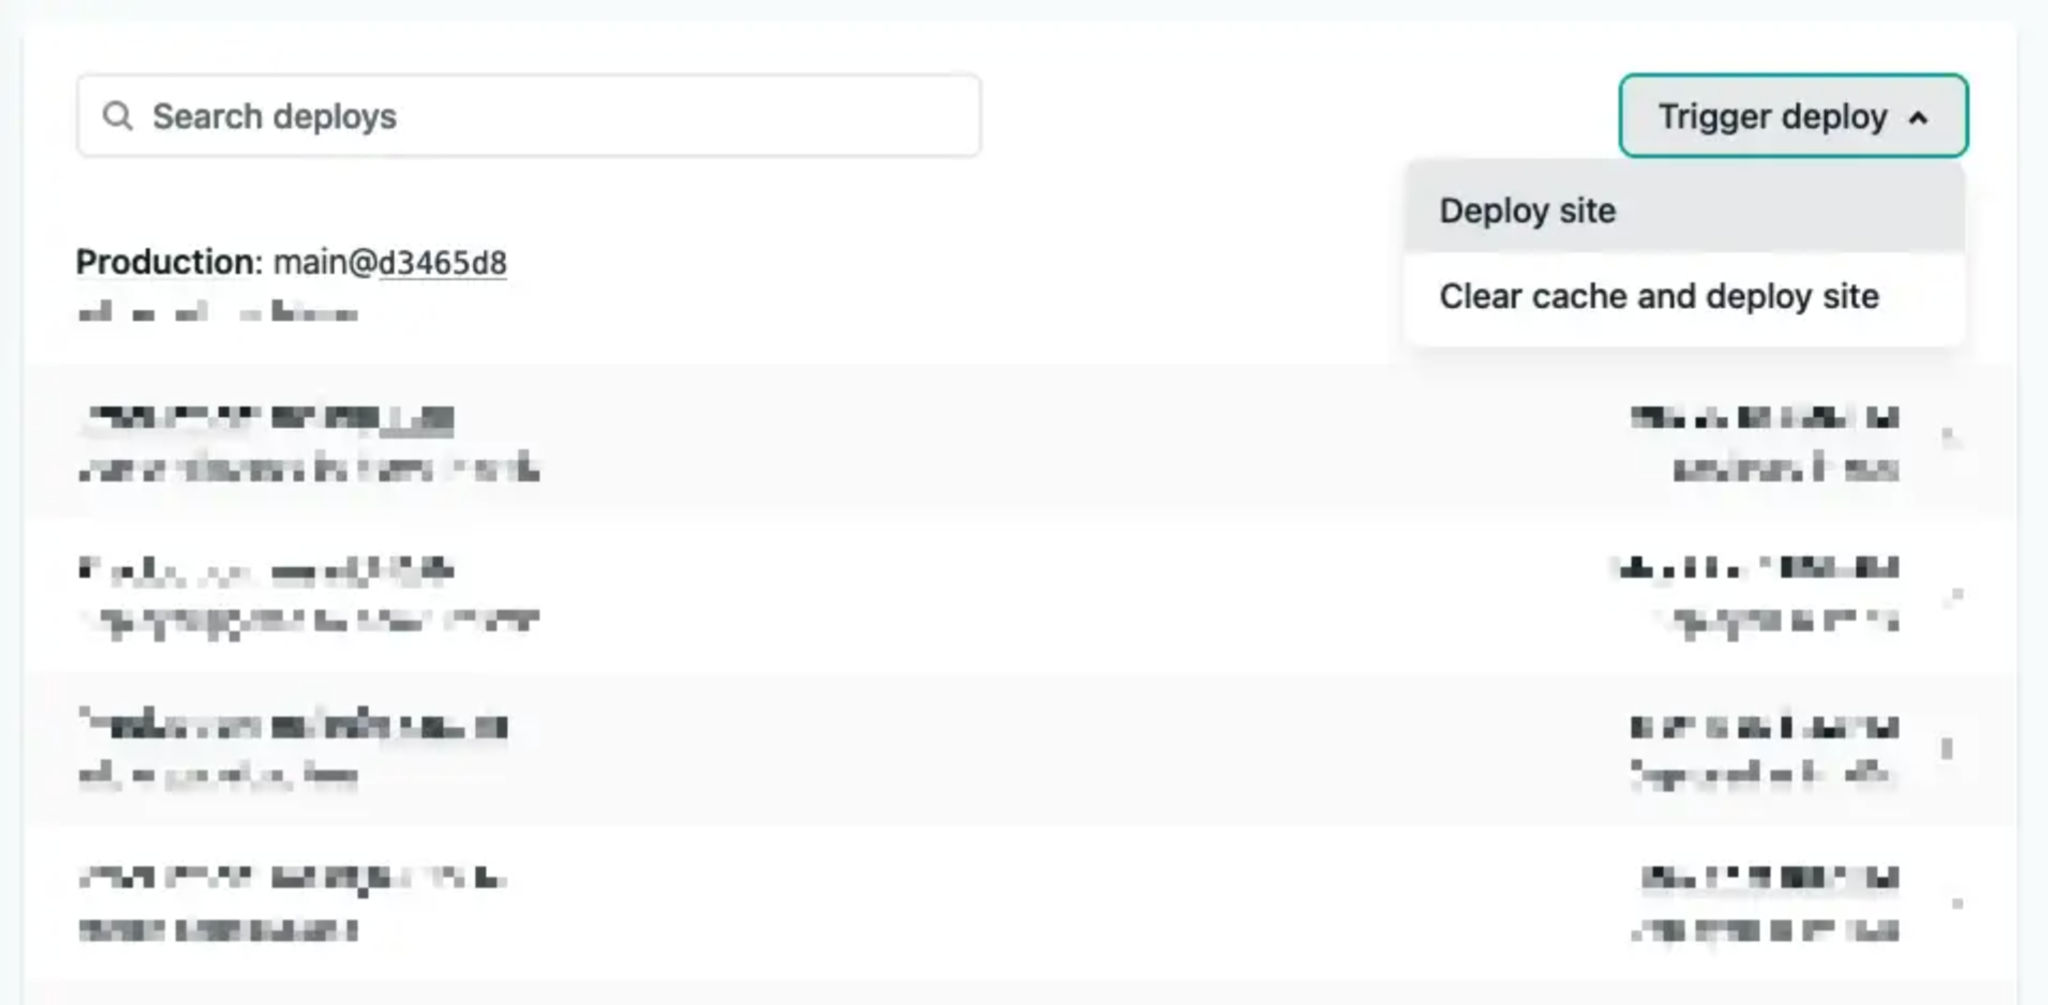
Head over to Netlify, select your website and click “Deploy” on the navigation.
On this page, you could click the “Trigger deploy” dropdown and click “Clear cache and deploy site”.
This will redeploy the latest deployment of your website.
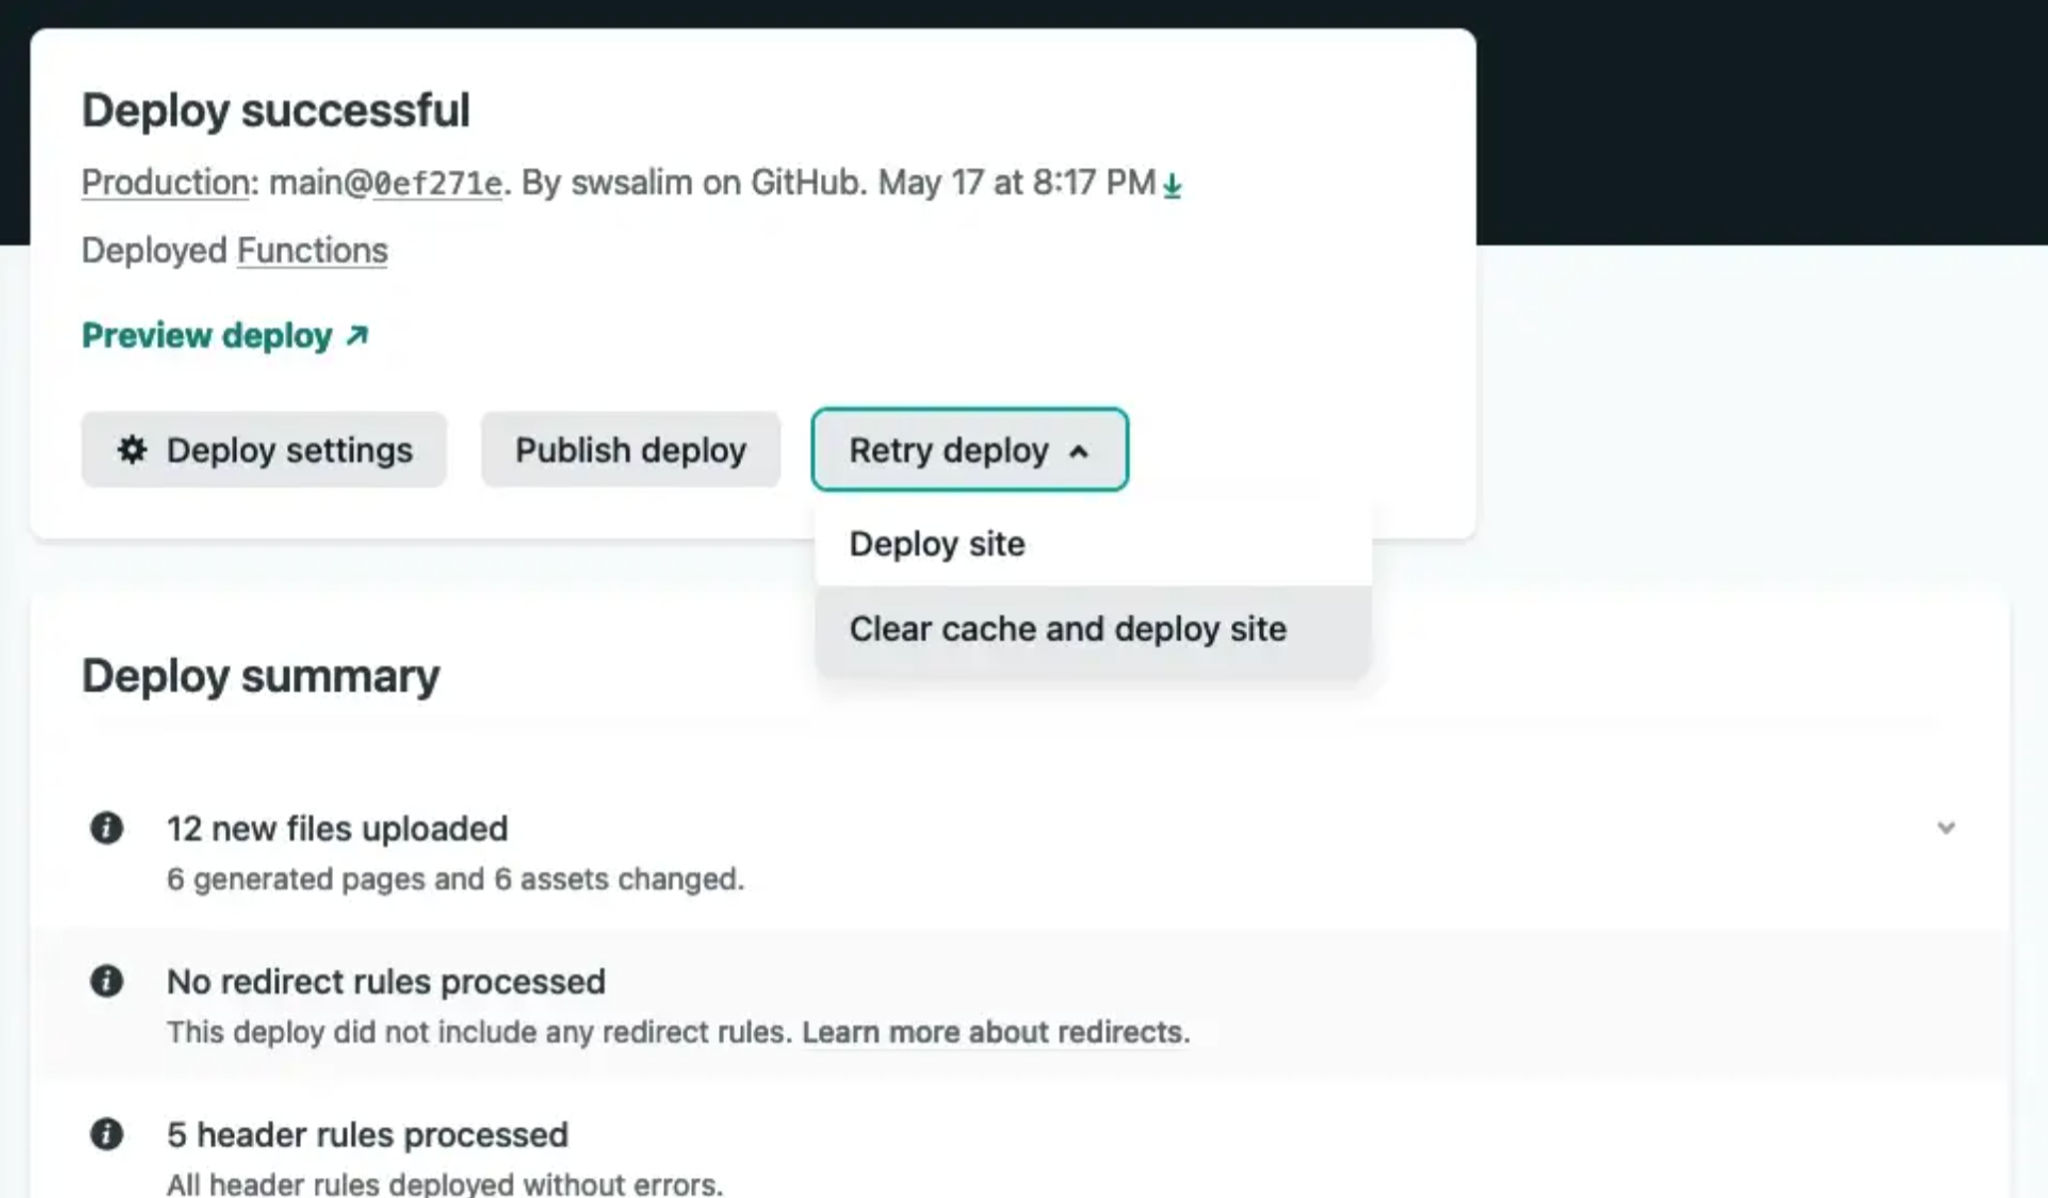
If you want to trigger past deployment, click on the specific deployment, click the “Retry deploy” dropdown, and click “Clear cache and deploy site”.
How Do We Automate the Build Process with Netlify Hook?
While that doesn’t seem like a lot of steps, why do we want to automate the build?
Imagine you have to do it every time you make changes to your content.
Let’s get started.
Create Netlify Build Hooks
Head over to Netlify and go to Deploy Settings and scroll down to the “build hooks” section.
Build hook is a unique URL that you could use to trigger a Netlify build.
Enter a build hook name and select branch to build.
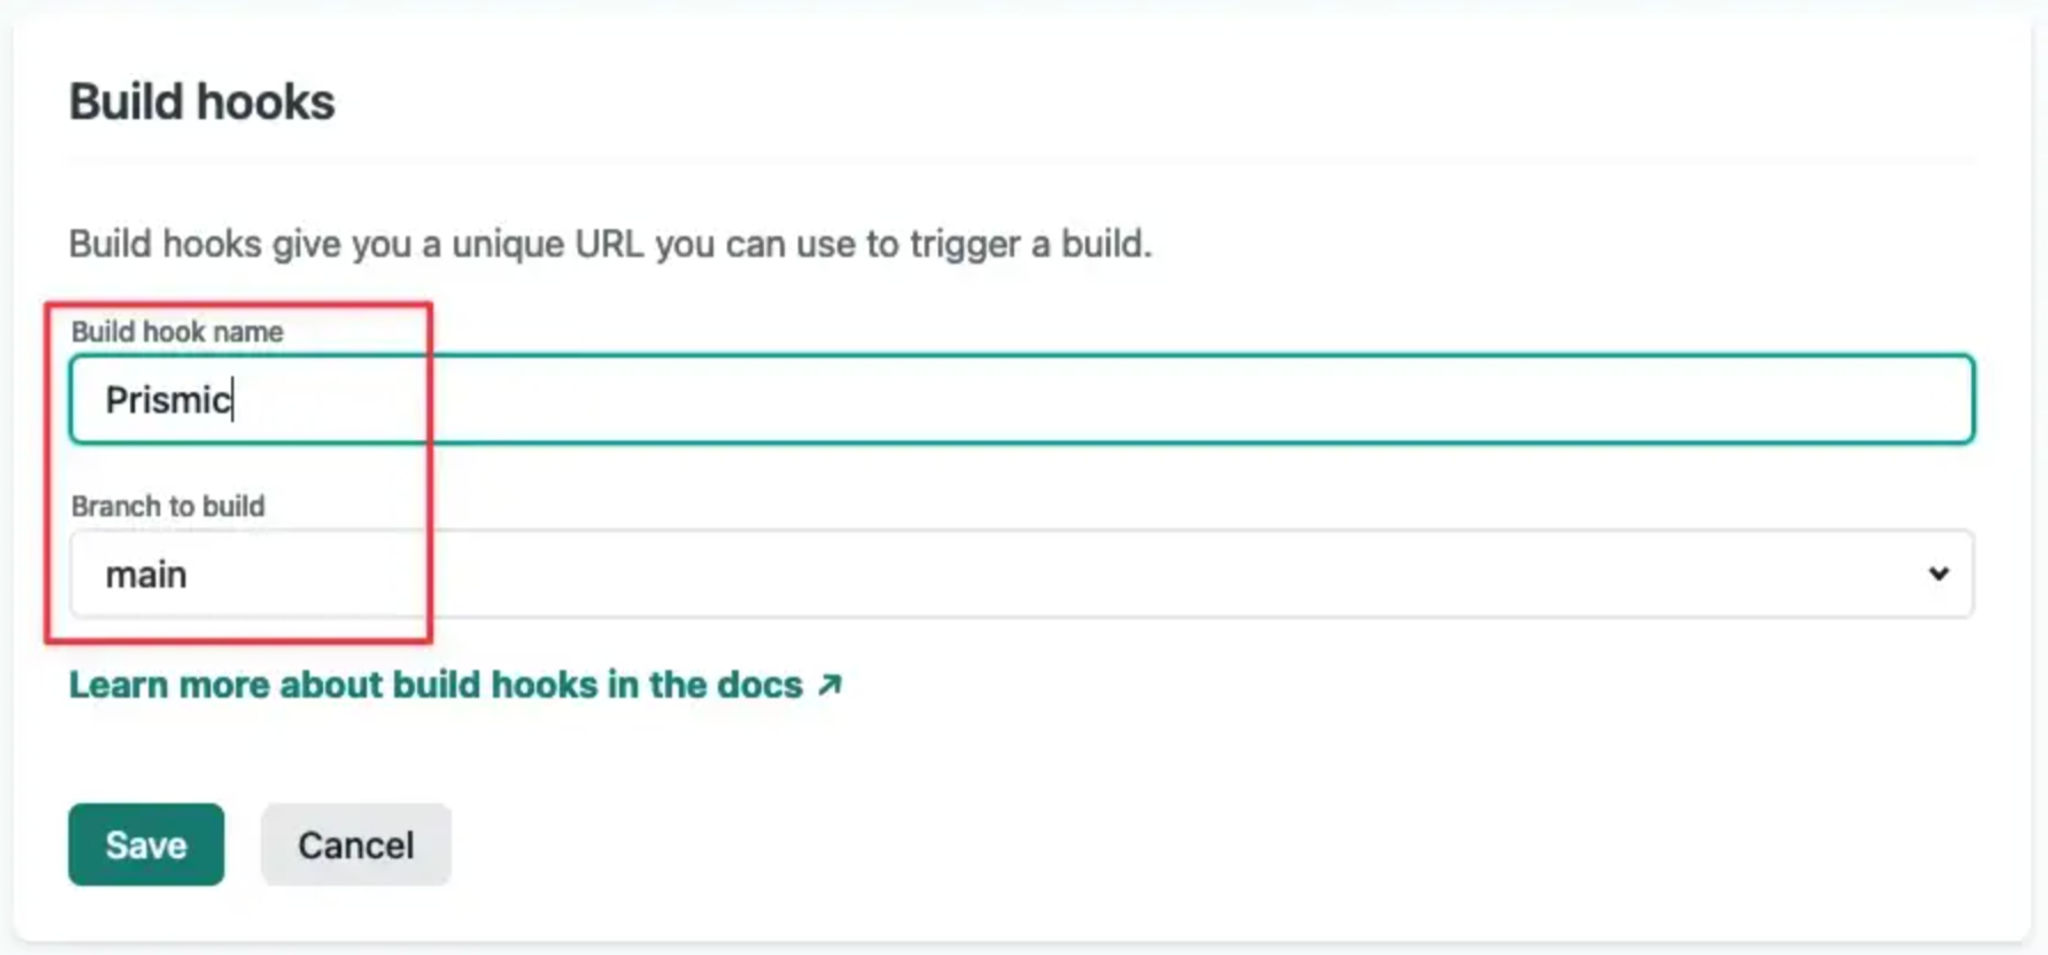
Netlify would generate a URL you could hook in Prismic.
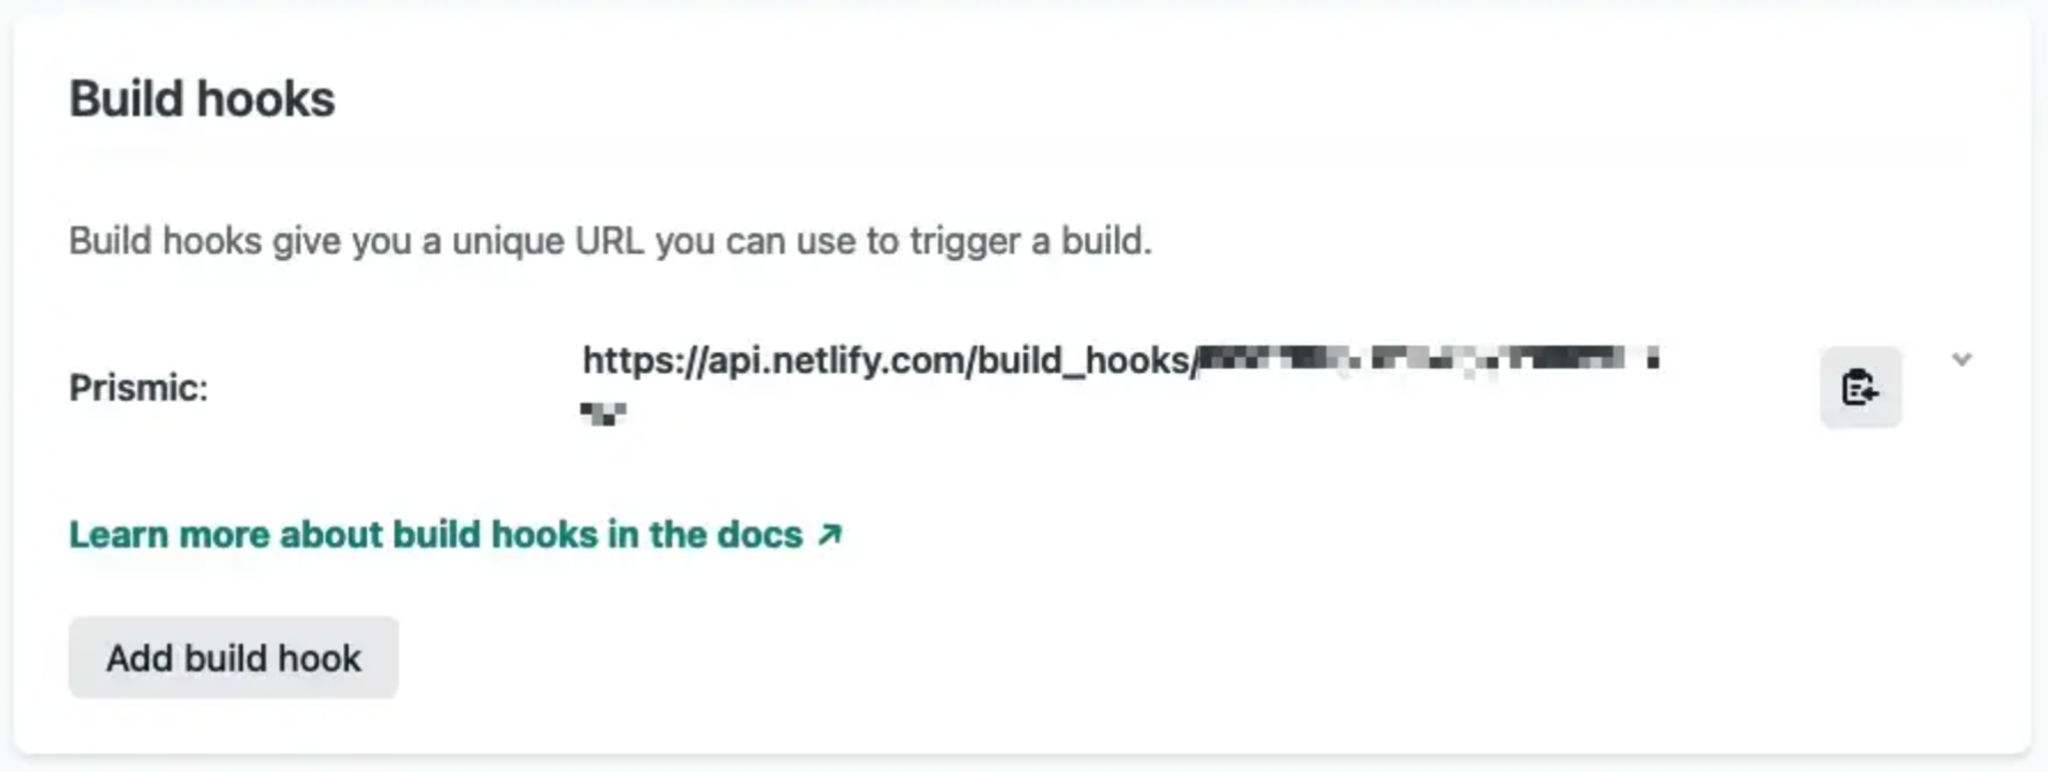
Next, we’ll create a webhook in Prismic.
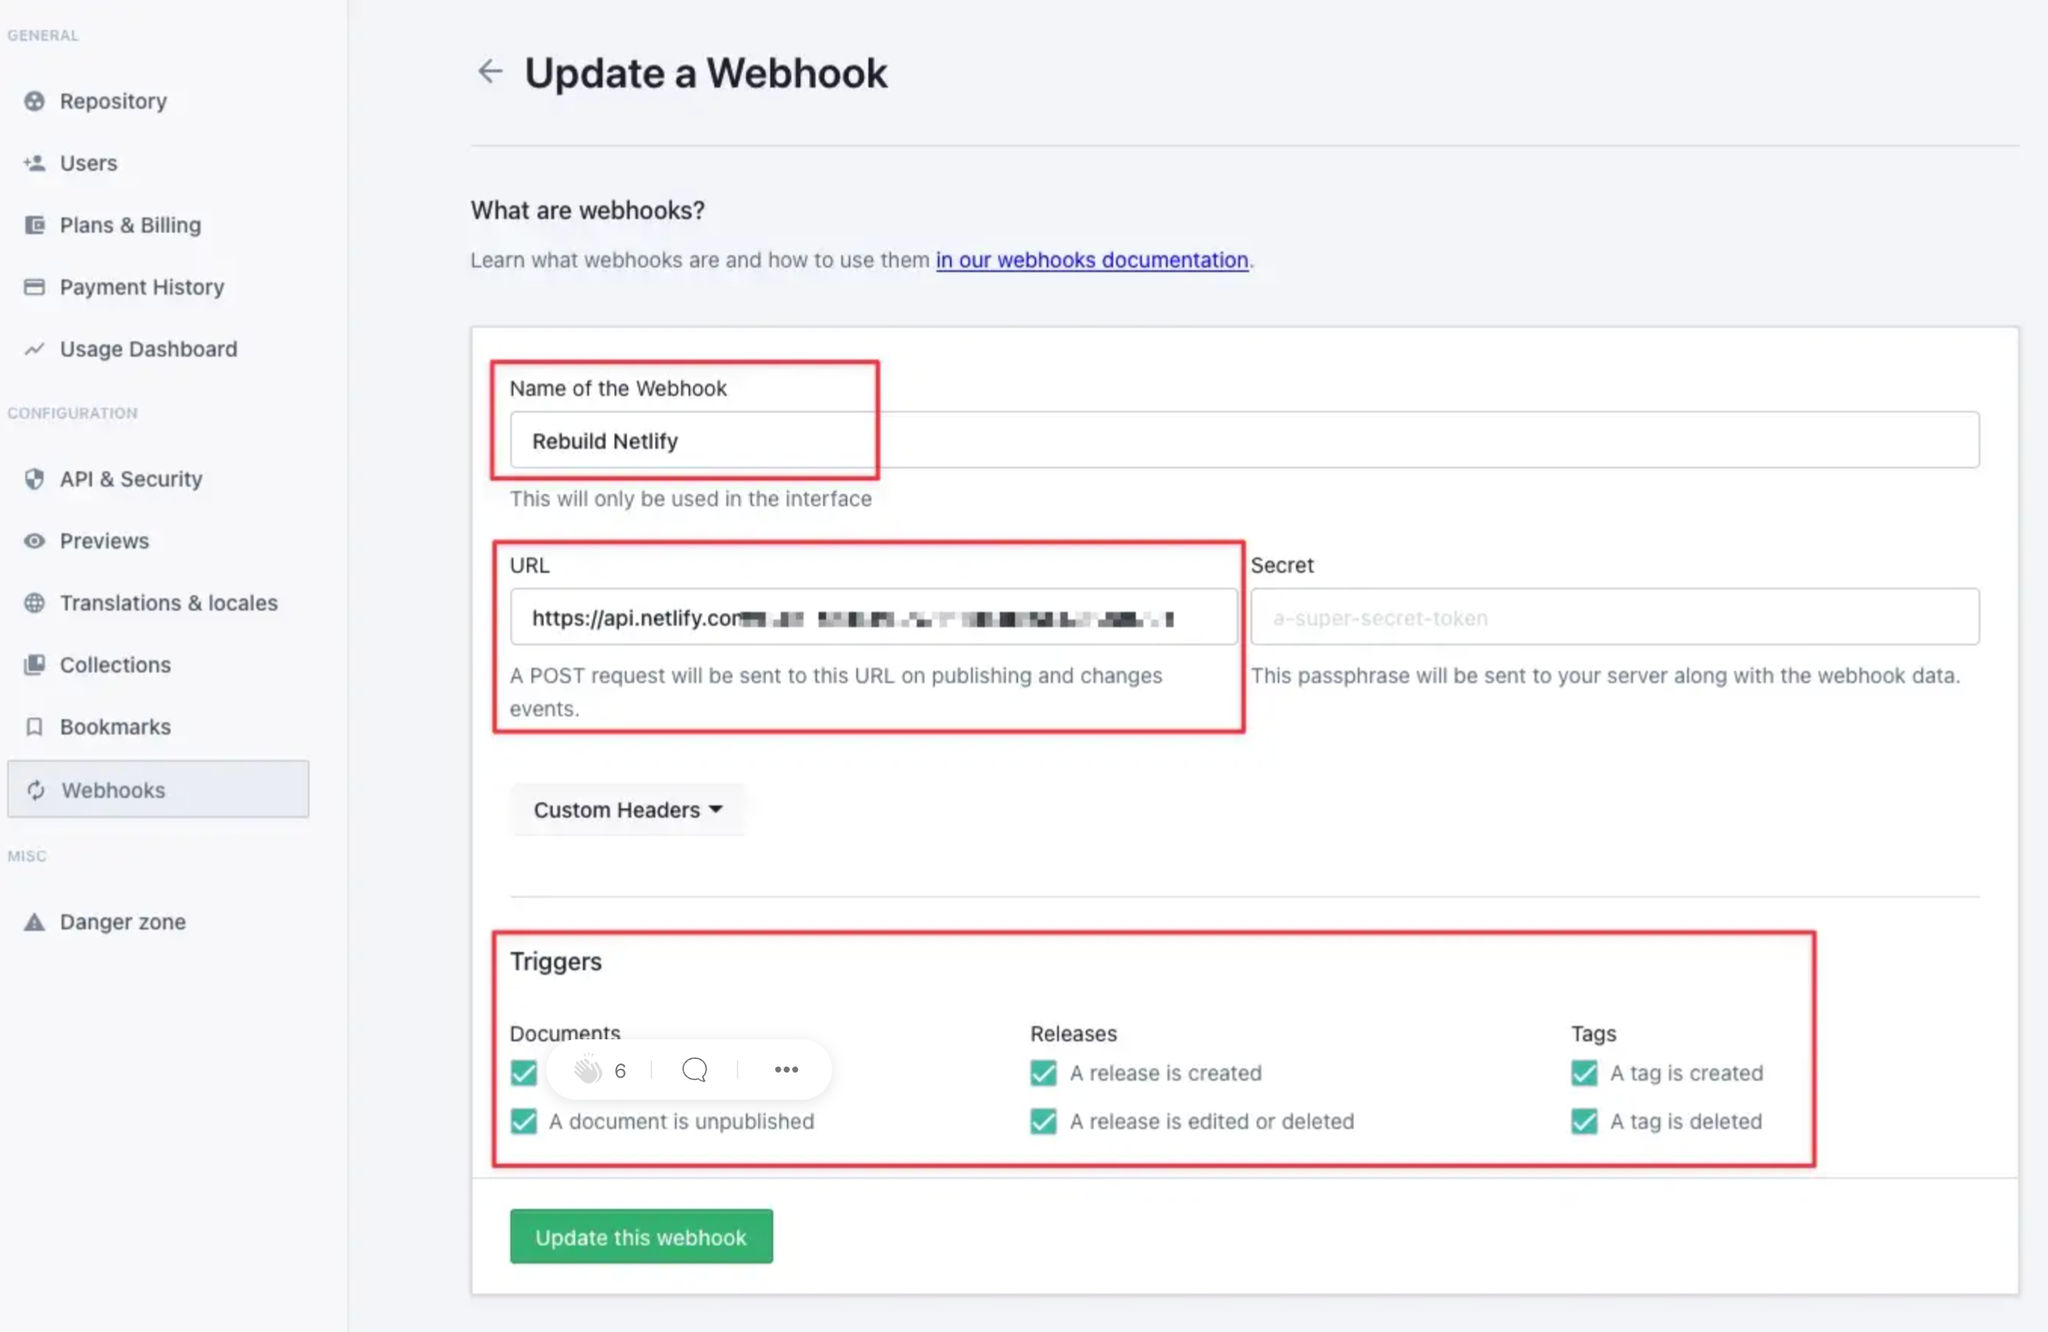
Create Prismic Webhook
We will create a webhook in Prismic that will trigger Netlify build based on the triggers we choose.
Head over to your Prismic’s dashboard, go to “Settings”, select “Webhooks” and click “Create a webhook” button.
Enter the Netlify build hook URL and select the triggers for the webhook.
You could toggle the webhook on/off or trigger the webhook manually as well.
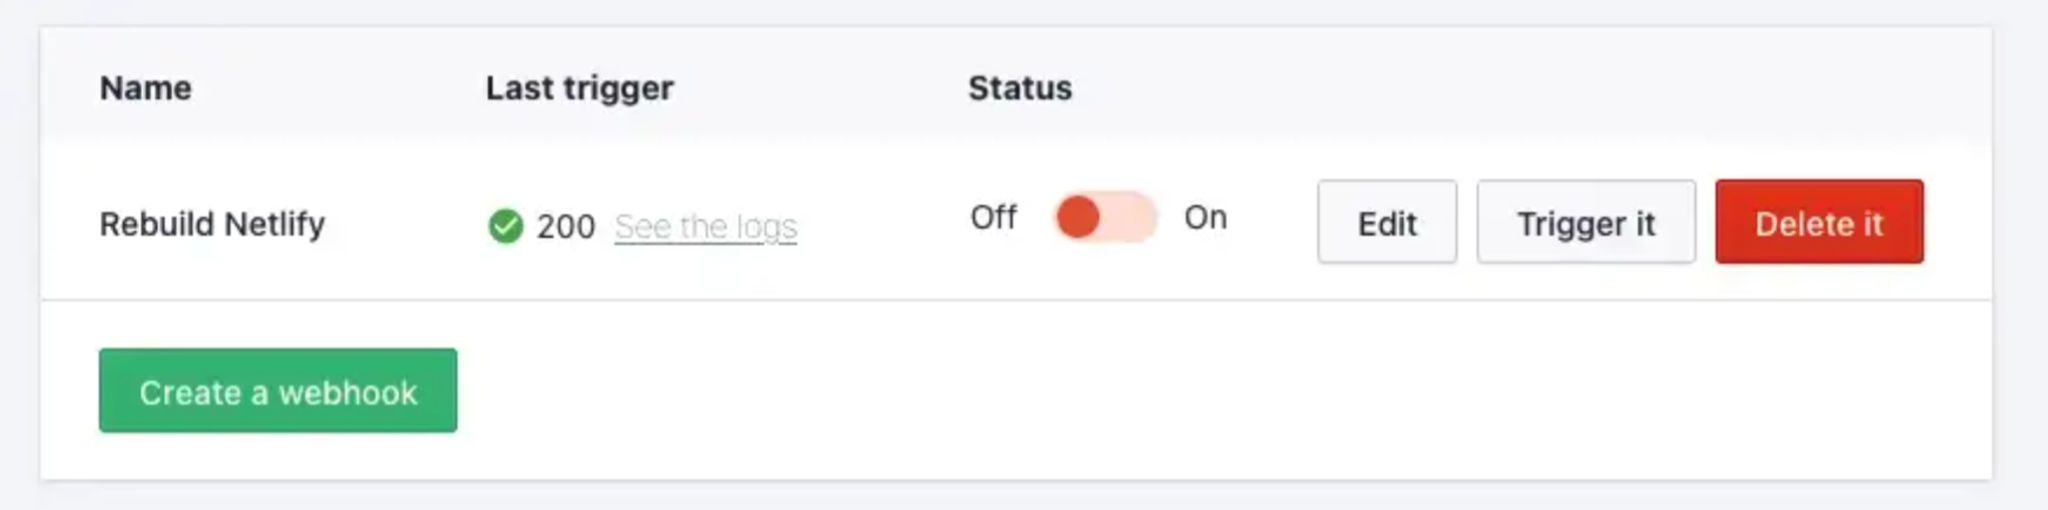
Now, every time you publish new content or update existing content, Netlify will re-build the website.